Written by Heather Morren
Did you know that your garden seeds can expire? Me neither. My mum always had a vast collection of seeds she had purchased or collected and I thought that “hit or miss” was just how it was with seeds. Turns out, that’s not the case. Seeds actually have a “shelf life” and I’m here to tell you a bit more about how long seeds generally last and what you can do to ensure you use them in a timely manner and to store them in a way that will improve their viability.
How long do seeds last?
Let’s start with seed lifespan, which relies heavily on what plant you have seeds for. Plants such as onions and corn tend to last 1-2 years. Other vegetables like beans, peas, carrots, lettuce, and spinach are good for about 3-4 years. If you’re looking for seeds that stand the test of time, cucumbers, tomatoes, broccoli, cauliflower, squash and melons can last 5 or more years. Annual flower seeds last approximately 1-3 years, while perennials last about 2-4 years.
How do I know if my seeds are still good?
There are two main ways to tell if your seeds are still viable:
- Visual inspection
- Germination (also known as “try it and see”, according to my mum)
Visually speaking, your seeds should not have changed color or have mold. Seeds that are shriveled or appear damaged are unlikely to still be usable. They should also not have an unusual smell.
You could also try to grow your seeds and see what happens. Place the seed on a damp paper towel and seal it in a plastic bag for 7-10 days. If they begin to sprout, then it’s likely they are still good to go.
How should I store my seeds?
Some important things to consider when storing your seeds include:
- Keep seeds in airtight containers to prevent moisture exposure. You can also include a silica gel pack to absorb excess moisture. CHECK
- Store in a cool, dry, and dark place, like a basement or refrigerator. CHECK
- Avoid fluctuating temperatures and high humidity because it can cause seeds to deteriorate faster. CHECK (I think)
- Label your seeds with a purchase date to track the age of the package. Ummm…I’ll have to start doing this.
How can I organize my seeds?
There are many neat ideas out there for storing seeds.
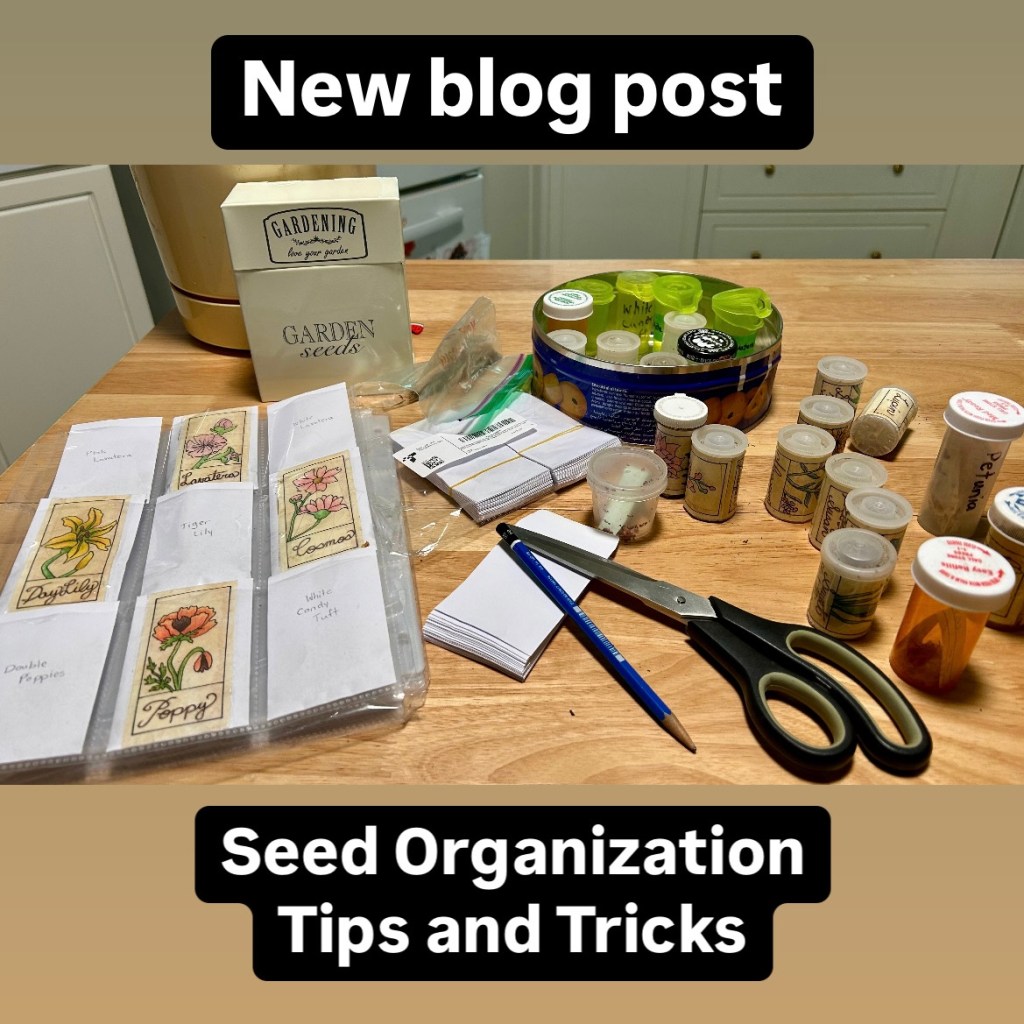
I’m sure you have accidentally opened a tin of biscuits, hoping to find a tasty treat, only to find disappointment, as well as, thread and sewing pins and needles inside. However, in my experience, my mom’s preferred seed storage was a biscuit tin with film canisters and old pill containers filled with seeds. A perfect solution, since both containers are airtight!

Another handy idea is to get yourself a recipe box (this one is from the Dollarstore). You can put seed packets right in it or add seeds to labelled ziplock bags or envelopes and add dividers for easy identification.

Last fall I tried the “throw everything in separate plastic bags, only some of which are labelled” strategy. Then I tossed all the baggies into an old plant pot. Can’t say I loved the system but it worked when I was too busy with back to school, wrapping up the gardening season and raising a little monster.

This year I plan to try a catalog system, using baseball (or Pokémon depending on your generation) card sleeves. The idea is to transfer your seeds to card sized blank envelopes (very easy to find on Amazon. I bought 100 for $10) and then slide them into clear binder sleeves. After that, you can put them into a sturdy three ring binder. It should be compact and super easy to find my seeds.

I’ve already started transferring over my seeds (what else do you do during those looooong cold winter months?). I removed the labels I made for my mum’s film canisters about 15-20 years ago and affixed them to the front of the seed envelopes. Looks like I have many more labels to make in the future. How exciting!
If you’re a nerd, like me, you might even go above and beyond in your seed organization and sort your seeds by category (type, season, growing requirements), alphabetically (like they’re books in a library), by expiration date, or even color code them. The possibilities are endless! And yes, I will also design a custom cover – I’m a millennial.
Obtaining Seeds
One of the super cool things about planting from seeds, especially if you’re incredibly frugal like me, is that you don’t have to just buy them from your local greenhouse (same goes for collecting clippings of indoor plants). You can also collect seeds from plants you already have growing in your garden. I have collected seeds from cosmos, sweet peas, petunias, hollyhocks, geraniums, and more! You can also host a seed swap where people bring their seeds they no longer want and switch them for the seeds you don’t want (or have way, way, way too many of).
It may seem like spring is a long ways off but, I promise, it’s just around the corner. Now is a great time to organize your seeds so you are ready to start planting as soon as the warm weather arrives!
Photos in this article were taken by Heather Morren. Information was sourced from a wide variety of online resources. Please ask, should you wish to see a full list.

Leave a comment